My daughter and I are going on a field trip to Fort York in Toronto; and even more fun, we're going to be attending dressed in early 19th century style, complete with mob caps, long skirts and petticoats! I made us the dresses and whipped up some mob caps for us. But I was still without a proper bonnet, and I read that it would have been unseemly for a married woman such as I to appear out of doors with nothing covering my head but a mob cap!
So, a bonnet seemed necessary. I got a "bee" in my proverbial "bonnet," and decided to make one myself. I couldn't find any free patterns online for the style of bonnet I wished to make; so I thought I'd just go ahead and put one out there myself. (I'll apologize now for the photos. It was just me, myself, and I, to hold the camera; and so I didn't have a camera man until the very end, when my husband helped me photograph the finished product . . . and also my pointy, shiny nose.)
Instead of going out and spending tons on some sort of rigid specialty sewing materials for the brim and a lot of extra cloth, I decided that a cheap bamboo place mat and an old pillow sham would fill the bill instead. And, as it turned out, they did!
I started figuring out a good shape for the brim by holding up cardboard to my head in front of the mirror, like a bonnet brim, and then trimming, running back to the mirror, re-trimming, and running back to the mirror again, until I got a shape I thought would work. Then transferred that to the place mat with a marker and started cutting. I was able to use kitchen shears to cut through that bamboo.
 |
| Here's the mat up-close, so you can get a better idea of what I used. |
 |
| A great thing was that this mat had a sort of cheesecloth glued to the back, so it didn't fall to pieces when I cut through the boarder, etc. |
 |
| I now have a bonnet brim - or at least the inside of one. |

The shape for the crown of the bonnet was sort of a guess, guided by the crown piece from a pattern for a regular "floppy" style of pioneer child's bonnet. I chose a child's size because I figured smaller would mean that the back of my bonnet would be less poofy. (At the end of this blog, I'll include a link so that you can download and print out my homemade patterns for these two pieces. It'll save you a lot of running back and forth between the cutting table and a mirror.)
 |
| OK, here are the two shapes. Ignore that I wrote "crown" on the right-hand pattern piece. I meant to write "bonnet brim" |

So, I cut out two of the bonnet "brim" (ignore "crown" written on the pattern in this photo.) - on the fold, of course. The pattern includes a 1/2" seam allowance, so your rigid place-mat brim piece will fit snugly inside once these two pieces are sewn together like an envelope.

Using things like pillow shams sometimes can save you a bit of time, if you decide, as I did, to re-use an existing hem to serve as the casing for a later drawstring (added as a means to pucker up the back edge of the crown at the back of the neck. More on this later.)
 |
| Just cut one of the bonnet "crown" piece - on the fold, of course |
I used the remaining cloth scraps to cut out two long 2"-wide rectangles to sew into bonnet ties. But you can also just use some nice wide grosgrain ribbon, if you've got it. I didn't, and I wanted my bonnet to be rather plain and prim this time.
 |
| Juuuust enough cloth left to eke out two bonnet ties. |

Once all my pieces were cut out, then the fun part could begin: assembly! First I put together the two "brim" pieces and sewed 'em together along the curved sides (what would later be the front of the brim.) Later the crown of the bonnet will be sewn to the "straighter" side, left open for now - to accept your piece of place-mat.
 |
| Do yourself a favor and trim down the seam allowance along the curved stitches so the excess fabric won't bunch up as much once you've turned the seams to the inside and started ironing. |

So, one thing I found was you want to make sure you iron your "envelope" for your brim (place-mat) piece carefully, so all the seams are folded right at the edge of the stitching and there isn't a lot of excess fabric bunching up in there.

Ok, this is the point where I could see whether I cut my pieces accurately. I slipped the rigid "place-mat" brim into the fabric "envelope." Acutally, it didn't exactly "slip" in. I had to work it in. The rough edges of the bamboo slats snagged on loose threads, and the former place-mat wanted to roll up (for easy storage) and otherwise passively resisted me as much as possible in this step. But . . . in the end, it fit, while leaving a good half-inch for a seam allowance along the still-open side. Yay! Now after all that, I had to take the rigid brim out again. Because, at this point, we've gotta sew the crown to the fabric part of the brim next, and we don't wanna' break our machines accidentally sewing through bamboo, do we?
Next, I marked the center of the raw edge of the brim fabric. And did the same for the crown piece, right at the top of the fold (Don't worry. I've marked the exact location on the pattern pieces for you.). These marks help you avoid making a cock-eyed bonnet!

At this point, I opened up the crown piece and sewed two gathering stitches (side-by-side, like train tracks), between the 1/2" seam line and the raw edge of the fabric. Hard-won lesson there: Do yourself a favor and don't try to do the whole edge in one long set of gathering stitches. It makes it harder to get the gathers even on each side of your bonnet crown; and, when they're that long, invariably one of your threads will break while you are pulling on 'em to gather up the material. I made my "pulling point" right where I marked the center of my curved edge of the crown piece, which made it easier to find later.
 |
| My "pulling point" for gathering both sides of the crown piece. I like to use wash-off felt-tip seamstress markers , rather than tailor tacks or chalk. |
 |
| Here's a better shot of me marking the center of the raw edge of the brim fabric "envelope" |

So now you've gathered both sides of your crown piece, thus shortening the length of the curved edge so that it is exactly (well, more or less, as this is sewing and not chemistry, and nothing will blow up if it's not
exact) the same length as the raw edge of your fabric brim pieces (now in "envelope form").

So, at this point, I needed to pause a moment and decide what to use for the drawstring that I needed to run through that "casing" along the straight edge of the crown piece. (Remember I took advantage of an existing hem in the pillow sham material to serve as my casing? I thought I was saving time; but, had I sewn it myself, I may have thought to make it wide enough to accommodate the cotton cord I had on hand. I had to switch to a narrow ribbon instead. But it worked in the end.)

I used my handy-dandy seam ripper to make an opening in the center point of the casing, thought which to pull the ribbon for adjusting the fit of the bonnet. Once the ribbon was pulled through this, with extra slack for tying, I anchored both ends at either end of the casing by sewing through 'em several times. The idea is to customize the fit of your bonnet by drawing it tighter at the nape of the neck (or loosening it).
 |
| Another one of my favorite sewing gadgets! It makes pulling string through casings and turning narrow pieces (like bonnet ties) right-side-out much easier! |
 |
| Alas, the cotton cord was too thick and I had to switch to a thin ribbon for my drawstring. |
 |
| Ribbon peeking out through that access hole in the center of the casing I opened up with the seam ripper. |

OK, after taking care of that drawstring, I was able to start attaching the already "puckered" edge of the crown piece to one of the raw edges of my fabric "envelope" for my brim piece. I made sure those dots I marked on the brim and the crown lined up, so I didn't end up with not enough brim on one side, and too much on the other. It's also worth it to use extra time and pins to make sure the two edges you're sewing together are exactly the same in length and adjust your gathers accordingly if they aren't.

And the sewing begins! Go slow, so you won't shed blood (on all those pins), sew in any unintended tucks in your brim fabric, or accidentally pull in the other edge of your brim fabric, effectively sewing closed your "envelope" before you've gotten a chance to slide in the "place-mat" brim piece!
 |
| You probably can't see this very well, but the crown is now attached to the brim fabric. Yay! |

Next thing to do was to "slip" that piece of place-mat brim back into the fabric envelope, making sure its edge lined up well with the curved seam and that the excess fabric of the seam allowance didn't bunch up and spoil the look of the brim's finished edge. The fit was nice and snug, and I was able to tuck the straighter edge of the rigid "place-mat" piece under the seam joining the gathered edge of the crown to the brim fabric.

Normally, at this step in putting together a regular "floppy" cloth-only bonnet, I would introduce the iron, to make a nice crisp edge after I fold the raw edge of the brim cloth under, in preparation for machine-sewing it down over that messy gathered raw seam. But, I didn't really want to experiment with ironing bamboo at this point; and really, the perfect fit between the "place-mat" piece and its fabric envelope cover pulled the fabric taut enough so that ironing wasn't really necessary. Hand-stitching was definitely the way to go here, as my machine probably wouldn't sew through bamboo (at least the manual didn't mention that feature.).
 |
| Again, the more pinning before you sew, the better. |
 |
| Half pinned closed. It's starting to look much more like a bonnet, huh? |
 |
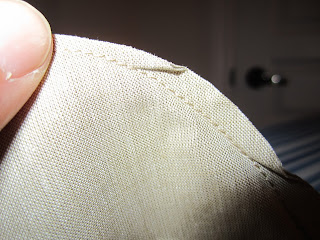
| A close-up of the brim's finished edge. |
 |
| Look at all those pins I used! |

And before I could sew it all closed, it occurred to me that I had forgotten all about the bonnet ties! In a perfect world, I would have remembered to sew them in when I was stitching up that curved edge of the brim fabric pieces (so they'd hang straight down instead of back towards my ears . . . but, as you will see, there's a fix for just about everything).
 |
| And, always remember to snip extra fabric away from your corners, so they'll come out nice and pointy! |
 |
| It's fiddly, turning the ties right-side-out. I have some tricks to make it easier. Maybe I'll post 'em - although, I'll bet another more professional seamstress may have already done so. |
 |
| Here I am remembering to tuck in the raw edge of one of my bonnet ties before stitching the end of the brim fabric closed. |
 |
| Reaching the end of sewing the brim fabric closed - and remembering to tuck in the other bonnet tie too! |
 |
| Now it's a bonnet with bonnet ties! |
 |
| I folded the bonnet ties so they point more "forward" and sewed 'em again so they're on nice-n-strong! |
 |
| Pull my little drawstring ribbon to make the back of the bonnet fit a bit tighter and . . . |
 |
| There's the bonnet - behind that blinding flash of light! |
 |
| At this point, my dear husband became available to take a clearer shot of the finished product. |
So, just as a warning, this is an untested product! I haven't yet worn it in the rain. I wouldn't begin to know how to wash it without destroying it. I have an idea that it might be easier, and have an equally nice effect, if I were to use one of those flexible plastic place-mats instead of a bamboo one. And inserting a row of ruffles in with that initial seam for the edge of the brim fabric is something I'd like to try. There are lots of modifications that'd be neat to try! Makes a person almost wish bonnets still were part of the modern woman's wardrobe . . . almost!
Anyway, I've tried my best to convert my homemade pattern pieces into a form easily shared online (see links below). Before you print them out, be sure that any "page scaling" or "fit to frame" your printer or PDF-viewing software may try is disabled. On one of them, I've written down where it should be exactly 15.5 cm long, so you'll know it hasn't been re-sized when you print it out.
Have fun sewing!


 The shape for the crown of the bonnet was sort of a guess, guided by the crown piece from a pattern for a regular "floppy" style of pioneer child's bonnet. I chose a child's size because I figured smaller would mean that the back of my bonnet would be less poofy. (At the end of this blog, I'll include a link so that you can download and print out my homemade patterns for these two pieces. It'll save you a lot of running back and forth between the cutting table and a mirror.)
 So, I cut out two of the bonnet "brim" (ignore "crown" written on the pattern in this photo.) - on the fold, of course. The pattern includes a 1/2" seam allowance, so your rigid place-mat brim piece will fit snugly inside once these two pieces are sewn together like an envelope.
 Using things like pillow shams sometimes can save you a bit of time, if you decide, as I did, to re-use an existing hem to serve as the casing for a later drawstring (added as a means to pucker up the back edge of the crown at the back of the neck. More on this later.)

 Once all my pieces were cut out, then the fun part could begin: assembly! First I put together the two "brim" pieces and sewed 'em together along the curved sides (what would later be the front of the brim.) Later the crown of the bonnet will be sewn to the "straighter" side, left open for now - to accept your piece of place-mat.
 So, one thing I found was you want to make sure you iron your "envelope" for your brim (place-mat) piece carefully, so all the seams are folded right at the edge of the stitching and there isn't a lot of excess fabric bunching up in there.
 Ok, this is the point where I could see whether I cut my pieces accurately. I slipped the rigid "place-mat" brim into the fabric "envelope." Acutally, it didn't exactly "slip" in. I had to work it in. The rough edges of the bamboo slats snagged on loose threads, and the former place-mat wanted to roll up (for easy storage) and otherwise passively resisted me as much as possible in this step. But . . . in the end, it fit, while leaving a good half-inch for a seam allowance along the still-open side. Yay! Now after all that, I had to take the rigid brim out again. Because, at this point, we've gotta sew the crown to the fabric part of the brim next, and we don't wanna' break our machines accidentally sewing through bamboo, do we?
 At this point, I opened up the crown piece and sewed two gathering stitches (side-by-side, like train tracks), between the 1/2" seam line and the raw edge of the fabric. Hard-won lesson there: Do yourself a favor and don't try to do the whole edge in one long set of gathering stitches. It makes it harder to get the gathers even on each side of your bonnet crown; and, when they're that long, invariably one of your threads will break while you are pulling on 'em to gather up the material. I made my "pulling point" right where I marked the center of my curved edge of the crown piece, which made it easier to find later.

 So now you've gathered both sides of your crown piece, thus shortening the length of the curved edge so that it is exactly (well, more or less, as this is sewing and not chemistry, and nothing will blow up if it's not exact) the same length as the raw edge of your fabric brim pieces (now in "envelope form").
 So, at this point, I needed to pause a moment and decide what to use for the drawstring that I needed to run through that "casing" along the straight edge of the crown piece. (Remember I took advantage of an existing hem in the pillow sham material to serve as my casing? I thought I was saving time; but, had I sewn it myself, I may have thought to make it wide enough to accommodate the cotton cord I had on hand. I had to switch to a narrow ribbon instead. But it worked in the end.)
  I used my handy-dandy seam ripper to make an opening in the center point of the casing, thought which to pull the ribbon for adjusting the fit of the bonnet. Once the ribbon was pulled through this, with extra slack for tying, I anchored both ends at either end of the casing by sewing through 'em several times. The idea is to customize the fit of your bonnet by drawing it tighter at the nape of the neck (or loosening it).
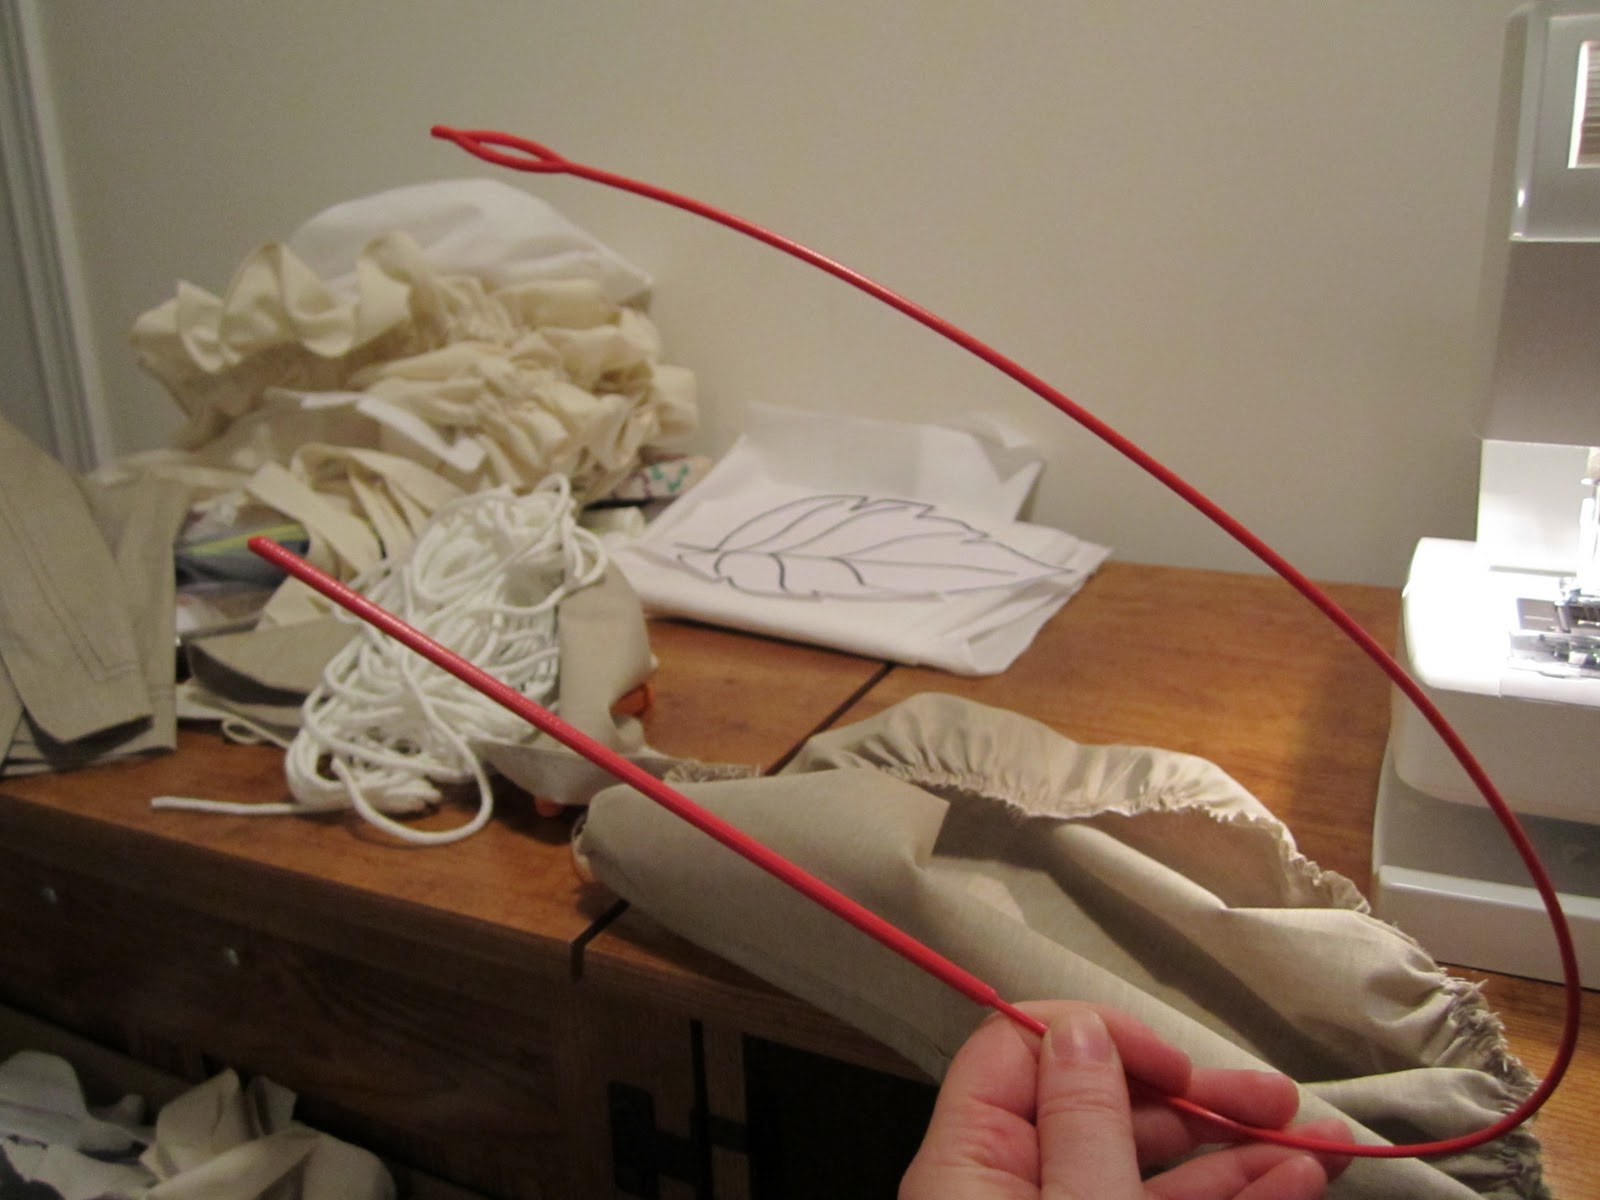


 OK, after taking care of that drawstring, I was able to start attaching the already "puckered" edge of the crown piece to one of the raw edges of my fabric "envelope" for my brim piece. I made sure those dots I marked on the brim and the crown lined up, so I didn't end up with not enough brim on one side, and too much on the other. It's also worth it to use extra time and pins to make sure the two edges you're sewing together are exactly the same in length and adjust your gathers accordingly if they aren't.
 And the sewing begins! Go slow, so you won't shed blood (on all those pins), sew in any unintended tucks in your brim fabric, or accidentally pull in the other edge of your brim fabric, effectively sewing closed your "envelope" before you've gotten a chance to slide in the "place-mat" brim piece!
 Next thing to do was to "slip" that piece of place-mat brim back into the fabric envelope, making sure its edge lined up well with the curved seam and that the excess fabric of the seam allowance didn't bunch up and spoil the look of the brim's finished edge. The fit was nice and snug, and I was able to tuck the straighter edge of the rigid "place-mat" piece under the seam joining the gathered edge of the crown to the brim fabric.
 Normally, at this step in putting together a regular "floppy" cloth-only bonnet, I would introduce the iron, to make a nice crisp edge after I fold the raw edge of the brim cloth under, in preparation for machine-sewing it down over that messy gathered raw seam. But, I didn't really want to experiment with ironing bamboo at this point; and really, the perfect fit between the "place-mat" piece and its fabric envelope cover pulled the fabric taut enough so that ironing wasn't really necessary. Hand-stitching was definitely the way to go here, as my machine probably wouldn't sew through bamboo (at least the manual didn't mention that feature.).


 And before I could sew it all closed, it occurred to me that I had forgotten all about the bonnet ties! In a perfect world, I would have remembered to sew them in when I was stitching up that curved edge of the brim fabric pieces (so they'd hang straight down instead of back towards my ears . . . but, as you will see, there's a fix for just about everything).


No comments:
Post a Comment