 |
| Faux Wood Plantation-Style Blinds |
So, my husband and I
rent out a beach condo. And part of managing a vacation rental is dealing with the things in the condo that need to either be repaired or replaced. (When folks are unfamiliar with a home, it's really easy to yank too hard or pull the wrong thing and snap some piece of plastic or cord or other.) More often than not, it makes more financial sense to replace rather than repair whatever's broken, since that seems to be the way most household items are manufactured at the moment (I stress
at the moment, because there is a growing availability of products and technologies - such as
Sugru and inexpensive
3D Printers - that now allow the private individual to actually repair things that are meant to be disposable, and to replace previously irreplaceable parts. But I digress).
One thing we can usually count on finding broken at the condo each year is one or two of our Faux Wood Plantation-Style window blinds. Often the mechanism for raising or lowering the blind is stripped or a cord has snapped, which means a trip to our local Walmart to buy a replacement.
Making The Proverbial Lemonade
 |
Disassembled Faux Wood
Plantation-Style Blinds |
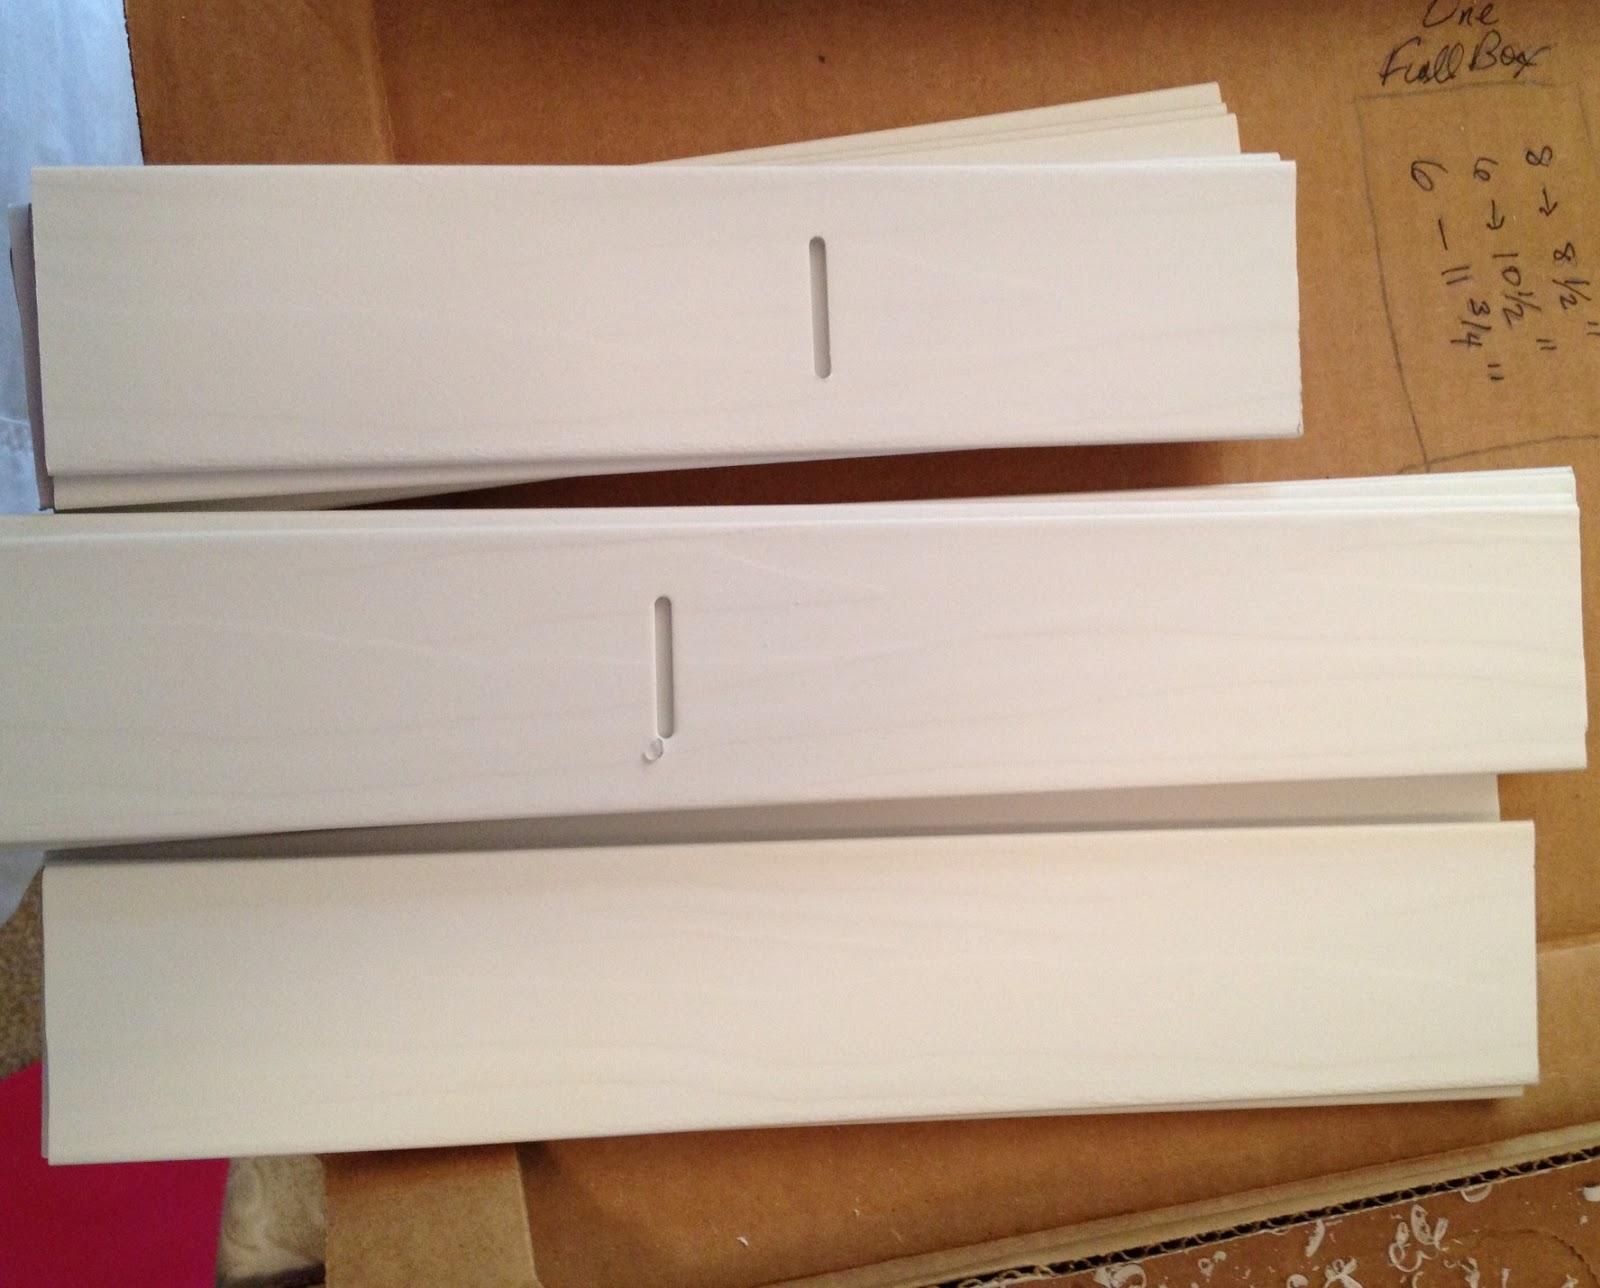
On one of these occasions, admiring the ingenuity with which those individual plastic slats were designed to mimic real slats of painted wood, I just could not bring myself to toss out the broken blind without trying to use at least part of it for something else! So I snipped the cords and saved the slats. It turns out these pieces of plastic (only a few millimeters thick, approximately 2 inches wide, and coming in nice long lengths, depending on the width of the window they covered) are a fantastic material for crafting lightweight, reasonably strong, and slightly flexible, structures.
A Snap To Cut
With a little experimentation, I discovered the easiest and quickest way to cut these plastic slats to a desired length is to score one on both sides with a box cutter (after measuring very carefully, of course) and then bend along the score until it snaps in two. You get a nice clean cut, with only a smidgen of rough material remaining, which is easily trimmed off with your blade - almost as easy as carving a bar of soap. But, you'll find that, as you get more precise in your measurements and more skilled at making a deeper cut with your blade, there will be less and less rough material to trim off.
 |
| Score on both sides |
|
 |
| Snap in two along the scores |
|
 |
| Trim off the rough |
|
 |
| All My Pieces Neatly Cut To Length! |
Building Useful Things

So, hopefully all this scoring, snapping, and trimming is leading to something useful. In my case, the first useful thing I made was a series of crude 4-sided frames. My idea was to make 15 of these to form the sides and bottom of 3 fabric-covered storage boxes (that's 60 piece of plastic slat, cut to length). Initially, I used duct tape to make a prototype of a frame. The lumpy corners (not to mention the frustration of trying to attach two of my slats together in a perfect 90-degree angle, while fighting with a cheap roll of duct tape that wanted to stick to me, the table, my hair, as well as the wrong spots on each of the four pieces I was attempting to make into one piece) did not any elegance to my creation - but it was reasonably strong and useful as a proof of concept. Later a visit to the dollar store in search of a strong and quick-drying adhesive led me to discover that
Super Glue has come a long way over the years. Not only is it now available in teeny single-use tubes (so you don't have to resign yourself to only one day's worth of glue because the reminder of the tube inevitably dries up overnight), but there are now special formulations of Super Glue made especially for bonding plastics! And in gel form! And all this for one measly dollar per pack of three! (I just wanted to take a moment to give that product a verbal pat on the back.) I also found the regular Super Glue works pretty well too.
Lack Of the Proper Tools Means Unwanted Gluing Adventures
So, I should mention the other two things I have found to be indispensable while gluing together your various pieces of plastic slat are: 1) a clamp, and 2) a square. Doing without a wood clamp results in the glue not adhering well (You may be tempted to try adding more glue, which will probably lead to your gluing your fingertips to a slat . . . or together). And failing to use a square will guarantee that you will not get . . . squares. At best, you will end up with wonky diamond shapes - or things that are not even polygons, because you the last two sides of your frame will not to meet up into that 4th corner you need.
 |
| Clamp While the Glue Dries |
|
 |
Remember Which Lengths To Glue
To Which Lengths - In Fact, Lay Them All Out Beforehand. |
|
 |
A Square Will Help You Get
Actual Squares |
| |
Getting Things Sewn Up
Once my frames were complete, the next part of the project called for some sewing. My plan was to make a loooong rectangular "pocket," in which I could fit the four frames intended to serve as the four sides of a storage box, in side-by-side configuration.
.JPG) |
| Four frames arranged side-by-side |
I cut out and sewed together two long rectangles of material, long enough to cover the whole row of frames, with enough excess to allow for seams and extra material to fold around the corners of the box. Once you place the four frames side-by-side into the "pocket," the fabric will support them in the following configuration, and you will be able to sew the ends together, to form the 4th corner.
.JPG) |
| Four frames arranged as the sides of a box |
If you decide to use a contrasting fabric to cover the inside of the box, you may wish to cut the "inner fabric" shorter and the "outer" fabric the same amount longer, so that the long "pocket you create will look like this:
 |
Fabric pocket, ready for you to
slip in all 4 frames, arranged in a row. |
Cut out and sew together two other rectangles of fabric to cover the fifth frame, like a pillowcase. Slip in that fifth frame and sew shut the opening, and this will serve as the bottom of your box. Now you can take the four fabric-encased frames, which you sewed together at their ends to make a 4-sided "bottom-less" box, and put in your fabric-covered fifth frame as the box bottom. Attach the raw bottom edges of the fabric-covered sides to the fabric-covered box bottom, either by hand sewing (If you have a curved upholstery needle, this helps a lot.) or hot glue.
 |
Bottom of box, where edges of fabric-
covered 5th frame meet the bottom edges
of the 4 fabric-covered sides |
Voilà : An Inexpensive, Attractive Storage Box

I won't say building those 15 different-sized frames and covering 'em with material was quick and easy, but it was
way cheaper than buying ready-made storage boxes. Plus, there is the added bonus of getting them in precisely the exact sizes I need for the shelves on which they must fit, and in my choice of fabric.
I used some excess fabric to make matching handles, and attached them securely through small holes cut through the sides of each box, using more hot glue to secure them and to also prevent any fabric unraveling around the holes. Now, put together with an inexpensive set of melamine shelves, they make a handsome chest of drawers.
Now, the next time we find a broken blind needs replacing at our condo, I will be smiling. I think I will run out of broken blinds long before I run out of ways to use them up!


.JPG)
.JPG)


No comments:
Post a Comment